为Windows编译Python安装包
Build Python binary installers for Windows.
本文探索了如何编译适用于 Windows 的 Python 二进制安装包。
前言
Python 官方对于 安全修复版本 (security fix release) 一般不提供 二进制安装包 (binary installer) 。
例如 Python 3.7.9 是 Python 3.7.x 系列中最后一个为 Windows 和 macOS 提供二进制安装包的版本, Python 3.7.10 及之后的 Python 3.7.x 系列版本则只提供 源代码 (source-only release) 。
那么如何在 Windows 上安装 当前 (2021-06-28) 最新的 Python 3.7.x 即 Python 3.7.11 呢?
文末 附下载。
准备工作
官方文档
查阅 官方文档 的 Python Setup and Usage 一节可以找到题为 Compiling Python on Windows 的说明:
If you want to compile CPython yourself, first thing you should do is get the source. You can download either the latest release’s source or just grab a fresh checkout.
The source tree contains a build solution and project files for Microsoft Visual Studio 2015, which is the compiler used to build the official Python releases. These files are in the PCbuild directory.
Check
PCbuild/readme.txtfor general information on the build process.
下载 Python 3.7.11 的 源代码 [1] [2] 并解压,找到 PCbuild/readme.txt :
- Install Microsoft Visual Studio 2017 with Python workload and Python native development component.
- ... requires an installation of Microsoft Visual Studio 2017 (MSVC 14.1) with the Python workload and its optional Python native development component selected. (For command-line builds, Visual Studio 2015 may also be used.)
- To build an installer package, refer to the README in the
Tools/msifolder.
再找到 Tools/msi/README.txt :
For testing, the installer should be built with the
Tools/msi/build.batscript:build.bat [-x86] [-x64] [--doc]For an official release, the installer should be built with the
Tools/msi/buildrelease.batscript and environment variables:set PYTHON=<path to Python 2.7 or 3.4> set SPHINXBUILD=<path to sphinx-build.exe> set PATH=<path to Mercurial (hg.exe)>; <path to HTML Help Compiler (hhc.exe);%PATH% buildrelease.bat [-x86] [-x64] [-D] [-B] [-o <output directory>] [-c <certificate name>]
编译环境
本文在全新的 Windows_7_SP1_64-bit 虚拟机上进行编译;宿主机为 Windows_10_20H2_64-bit ;目标 Python 版本为 3.7.11 。
所需软件
Visual Studio 2017
虽然 文档 [3] 中说 VS2015 可能也行,但经过我的实际测试,VS2015 会在编译开始时的某一步报错,因此仍建议选择安装 VS2017 。
选择 Professional 或 Enterprise 等付费版本(30 天试用期),可以在最后一步 "编译发行版 " 时启用 PGO 优化 [4] 。
但经过实际测试,Community 版本也可以正常地启用 PGO 优化。
Visual Studio 2017 的安装包可以从 此处 下载,但需要注册并登录 Microsoft Azure DevOps 。当前有效的几个下载直链分别是:
- Visual Studio Community 2017 :
vs_Community.exe - Visual Studio Professional 2017 :
vs_Professional.exe - Visual Studio Enterprise 2017 :
vs_Enterprise.exe
该版本的详细信息为 Visual Studio 2017 (version 15.9.36) (MSVC 14.16)。
Python 3.6+
编译 Python 安装包需要先安装 Python 3.6 或之后的版本。本文采用 python-3.7.9-amd64.exe。
简洁起见,我将 Python 的安装目录设置为 C:\Python\Python37 。你当然可以使用默认设置,但建议安装路径中不要含有空格等特殊字符。另外,记得勾选 Add Python 3.x to PATH 。
Git for Windows 2.x
Git 的版本并不关键,本文采用 Git-2.32.0-64-bit.exe 。
安装 VS2017
安装流程
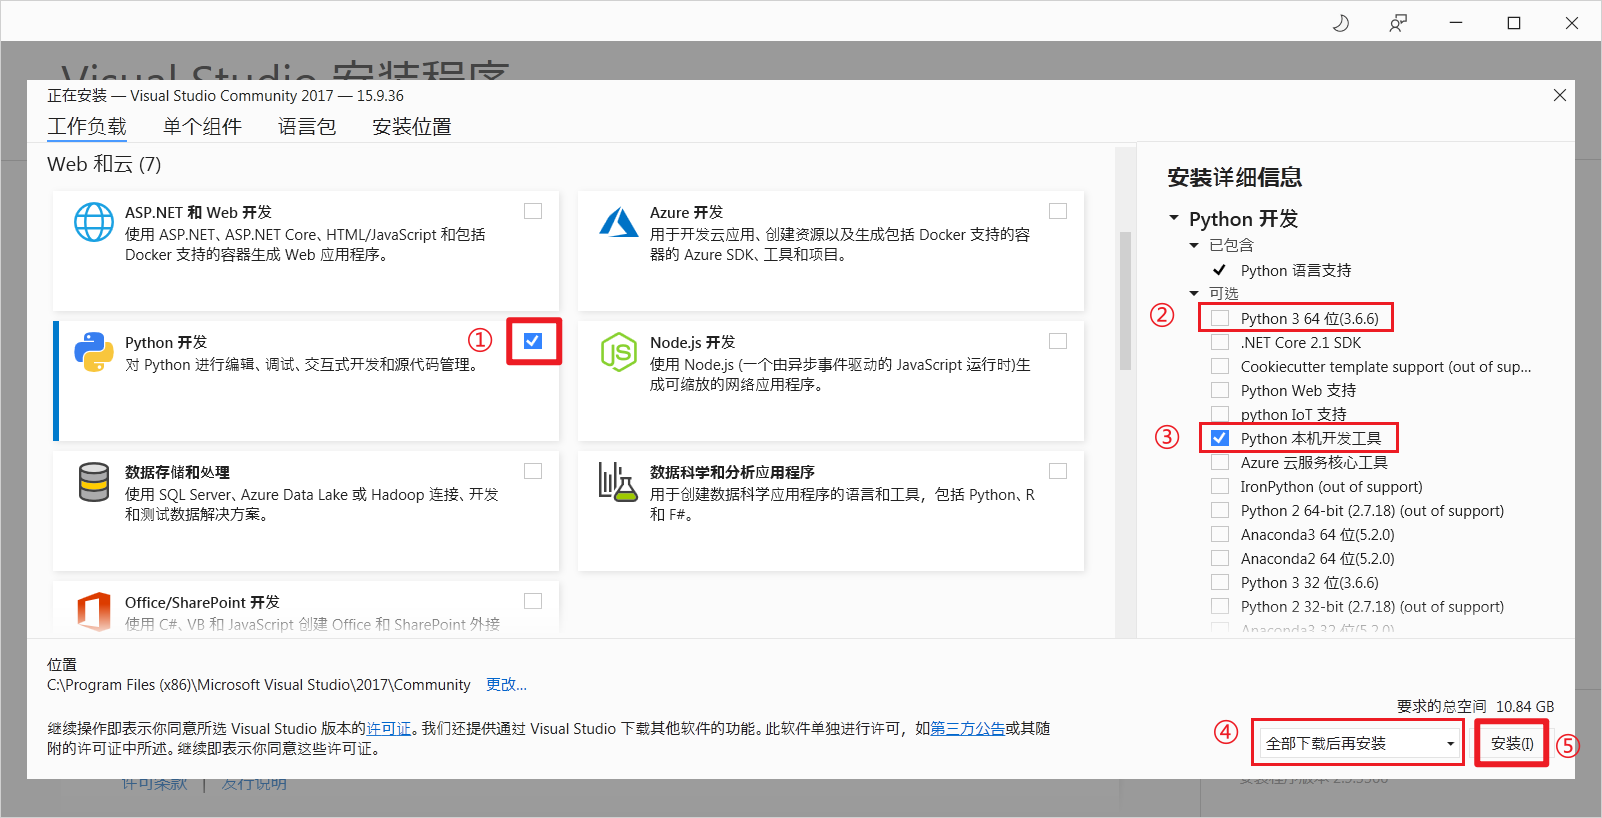
双击运行 vs_Community.exe 等,即开始自动安装 Visual Studio Installer 。然后选择 工作负载 中的 "Python 开发 (Python development workload)" 及其可选子项 "Python 本机开发工具 (Python native development tools component)" ,要求的总空间约为 11 GB 。本文使用默认安装路径。
耐心等待安装完成。
注意,VS2017 安装完成后无需打开,之后的编译全过程可以在 CMD 命令行中完成。
安装指北
在全新的 Windows 7 系统上安装 Visual Studio 2017 时可能遇到问题,你可能需要先安装以下两项依赖。
.NET Framework 4.6
打开 vs_Community.exe 等需要 .NET Framework 4.6 运行时。
- 在 官方下载页面 的 Advanced downloads 中选择 Offline installer 的 Runtime
- 或通过直链下载:
NDP46-KB3045557-x86-x64-AllOS-ENU.exe
Windows Updates
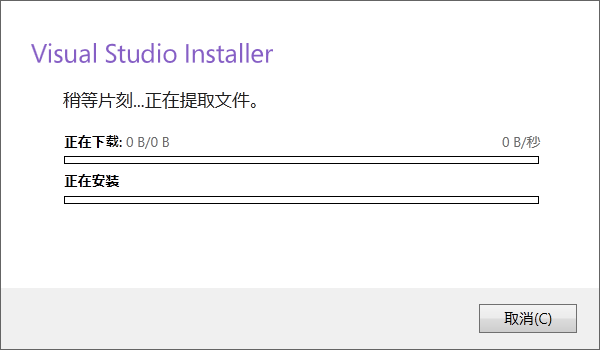
VS2017 在线安装时可能卡在 "稍等片刻... 正在提取文件" ,有两种可行的解决方案 [5] :
编译
必要依赖
下载 Python 3.7.11 的 源代码 [1] [2] 并解压。
# 尝试首次构建 CPython
$ PCbuild\build.bat
脚本会首先下载并构建外部依赖,包含 bzip2 , sqlite-3 , xz , zlib , openssl , tcltk 等。
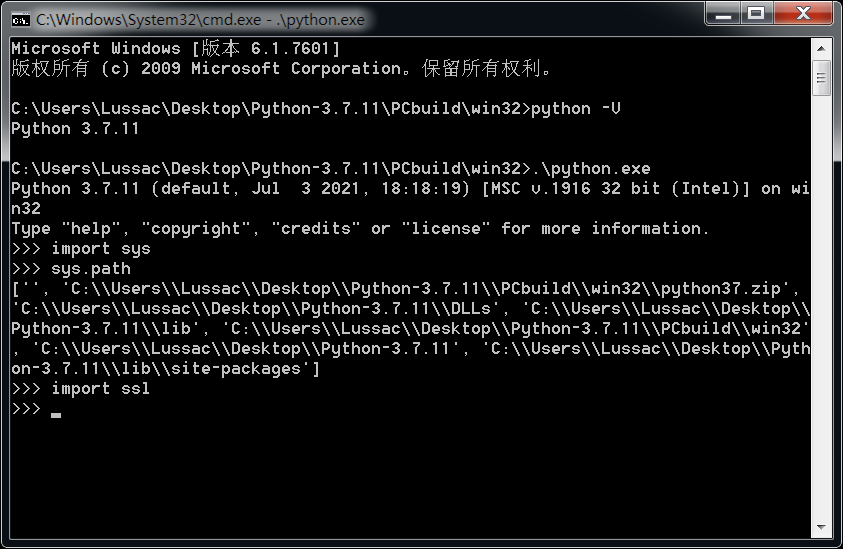
你可能会遇到 SSL 相关问题,只需修改 PCbuild/get_external.py 即可;
另外 get_external.py 将从 GitHub 下载外部依赖的源码,因此你可能还需要为 urllib.request.urlretrieve() 函数指定代理。
from urllib.request import urlretrieve

# 添加以下两行语句以禁用 SSL
import ssl
ssl._create_default_https_context = ssl._create_unverified_context

# 添加以下三行语句以指定代理
from urllib import request
proxy = request.ProxyHandler({'https': 'http://192.168.1.200:10809'})
opener = request.build_opener(proxy)


def fetch_zip(commit_hash, zip_dir, *, org='python', binary=False, verbose):
    repo = f'cpython-{"bin" if binary else "source"}-deps'
    url = f'https://github.com/{org}/{repo}/archive/{commit_hash}.zip'
    reporthook = None
    if verbose:
        reporthook = print
    zip_dir.mkdir(parents=True, exist_ok=True)

    # 添加此句以应用代理(需与指定代理的三行语句同时添加)
    request.install_opener(opener)

    filename, headers = urlretrieve(
        url,
        zip_dir / f'{commit_hash}.zip',
        reporthook=reporthook,
    )
    return filename
编译 CPython
此时 PCbuild/build.bat 应当能正确执行。编译需要一段时间,若能正常编译,则完成后的输出位于 PCbuild/win32 下。双击其中的 python.exe 即可打开 Python 的 REPL 交互式命令行。
这一步已经生成了能正常使用的 Python 解释器。如果你不需要编译 Python 的安装包,你可以不进行之后的步骤。
编译 MSI 安装包
编译 MSI 安装包 需要用到 Tools/msi/build.bat 。
# 尝试首次构建 MSI installer
$ Tools\msi\build.bat -x86
脚本会首先下载二进制依赖到 externals/windows-installer 下,包含 binutils , gpg , htmlhelp , nuget , redist-1 , wix 等。
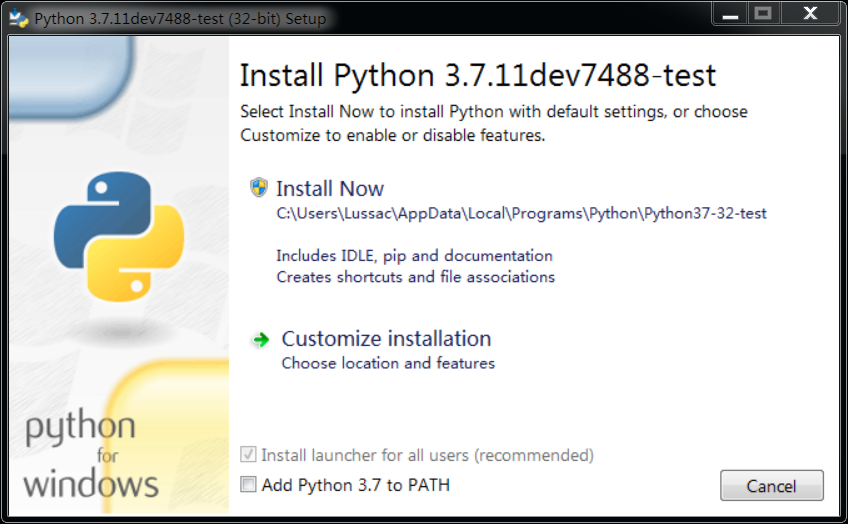
编译需要一段时间,若能正常编译,则完成后的输出位于 PCbuild/win32/en-us 下。其中包含一系列的 .msi 文件及其对应的 .wixpdb 文件,和最重要的安装程序入口文件 python-3.7.11.7488.exe ,双击打开即可执行 Python 安装流程。
尽管 Tools/msi/build.bat 中提到可以使用 --pack 参数来将 msi 文件打包进 exe 安装程序 [6] [7] :
# 尝试构建独立的 installer
$ Tools\msi\build.bat -x86 --pack
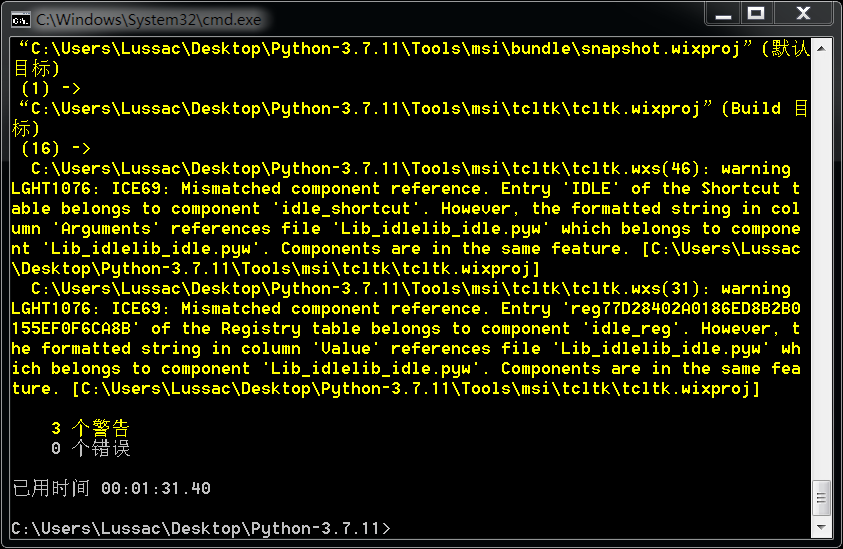
但经过我的实际测试发现并不能。可能是由于编译过程中出现了 "3~4 个警告" ?
编译文档
在编译发行版前不妨先编译好 python3711.chm 文档,否则你可能在下一步中遇到错误而无法打包。
Specify
--docto build the documentation (.chm) file. If the file is not available, it will simply be excluded from the installer. Ensure%PYTHON%and%SPHINXBUILD%are set when passing this option. You may also set%HTMLHELP%to the Html Help Compiler (hhc.exe), or put HHC on your PATH or inexternals/.
而查看 Tools/msi/build.bat 发现编译文档所使用的命令为 [8] :
Doc\make.bat htmlhelp
因此需要先安装 sphinx-build ,根据我的尝试,可用的版本为 sphinx 1.8 [9] [10] :
pip install "sphinx==1.8" 这里提供一个批处理脚本,可以在此后的步骤中使用到,建议保存为 env.bat 。其中的内容需要你根据情况自行修改。
@echo off

:: 指向之前 Python 3.7.9 安装目录中的 `python.exe`
set PYTHON=C:\Python\Python37\python.exe

:: 指向 `sphinx-build.exe` 的位置,可以通过 `where sphinx` 获得
set SPHINXBUILD=C:\Python\Python37\Scripts\sphinx-build.exe
:: 若文件路径含有空格等特殊字符,则使用引号包括
:: set SPHINXBUILD="C:\Program Files\Python37\Scripts\sphinx-build.exe"

:: 指向 Python 3.7.11 源代码解压目录中的 `hhc.exe`
set HTMLHELP=C:\Users\Lussac\Desktop\Python-3.7.11\externals\windows-installer\htmlhelp\hhc.exe

:: 将 "Python 3.7.9 安装目录中的 Scripts 目录" 和 "hhc.exe 所在目录" 加入 %PATH%
set "PATH=C:\Python\Python37\Scripts\;C:\Users\Lussac\Desktop\Python-3.7.11\externals\windows-installer\htmlhelp\;%PATH%"
重新打开一个 CMD 窗口,执行以下命令以构建 chm 文档:
# 将 env.bat 拖动到 CMD 窗口中即可自动填充路径
$ C:\Users\Lussac\Desktop\env.bat

$ cd Doc
$ mkdir build\htmlhelp
$ make.bat htmlhelp
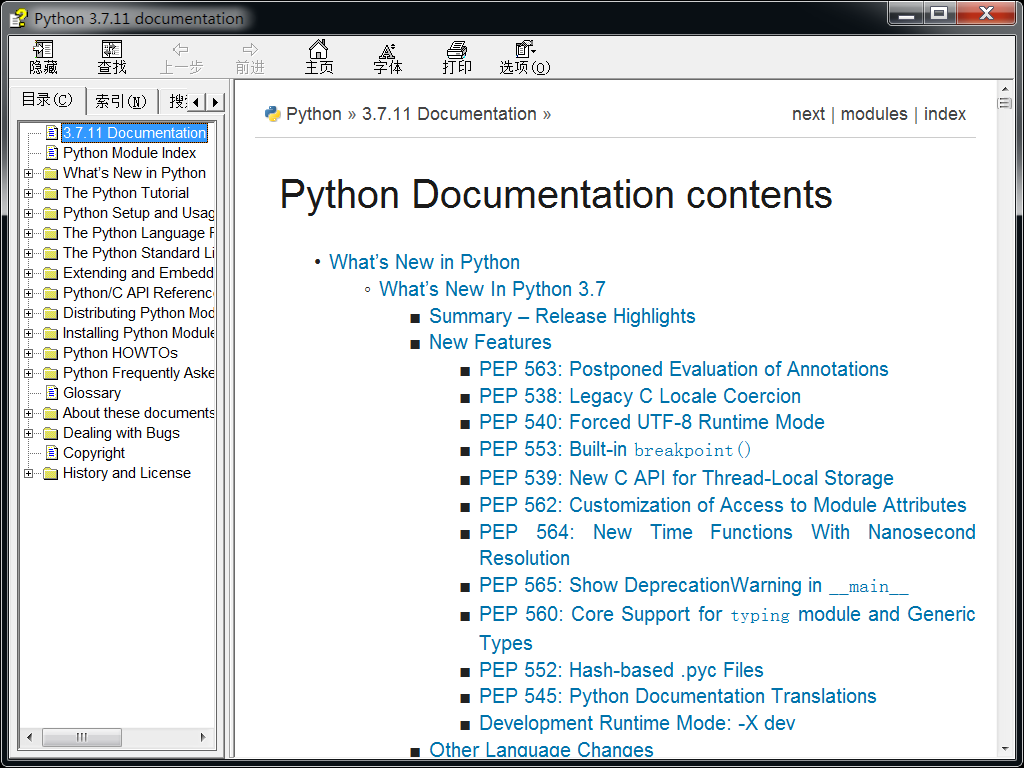
编译需要一段时间,若能正常编译,则完成后的输出为 Doc/build/htmlhelp/python3711.chm 。双击打开即可阅读 Python 3.7.11 文档。
编译发行版
构建 Python 安装包的发行版需要使用 Tools/msi/buildrelease.bat 而不是 Tools/msi/build.bat 。
For an official release, the installer should be built with the
Tools/msi/buildrelease.batscript and environment variables:set PYTHON=<path to Python 2.7 or 3.4> set SPHINXBUILD=<path to sphinx-build.exe> set PATH=<path to Mercurial (hg.exe)>; <path to HTML Help Compiler (hhc.exe);%PATH% buildrelease.bat [-x86] [-x64] [-D] [-B] [-o <output directory>] [-c <certificate name>]
因此需要先安装 Mercurial ,根据我的尝试,对版本应该没有特殊要求,这里选择最新版 5.8 。
$ pip install -U mercurial
# 或
$ pip install "mercurial==5.8"
根据 Tools/msi/buildrelease.bat 的 帮助说明 ,并结合 Tools/msi/README.txt ,构建 32 位 Python 安装包 所使用的命令为:
$ C:\Users\Lussac\Desktop\env.bat

$ cd Tools\msi

$ buildrelease.bat -x86 --skip-nuget -o C:\Users\Lussac\Desktop\outputs
# 或
$ buildrelease.bat -x86 -D -B --skip-nuget -o C:\Users\Lussac\Desktop\outputs
其中各个参数的意义为:
-x86: 构建 win32 版本的安装包。替换为-x64可构建 amd64 版本的安装包;省略此参数则构建两个版本的安装包。-D: 跳过文档的重新构建。因为上一步已经构建完成了。但若文档不存在会导致构建失败。-B: 跳过 CPython 的重新构建。当你不是第一次执行buildrelease.bat时可以添加此参数。-o: 指定输出目录。便于找到编译产物。--skip-nuget: 跳过 Nuget 包的构建。因为这一步经常卡住,且其对最后生成的 Python 安装包没有影响。
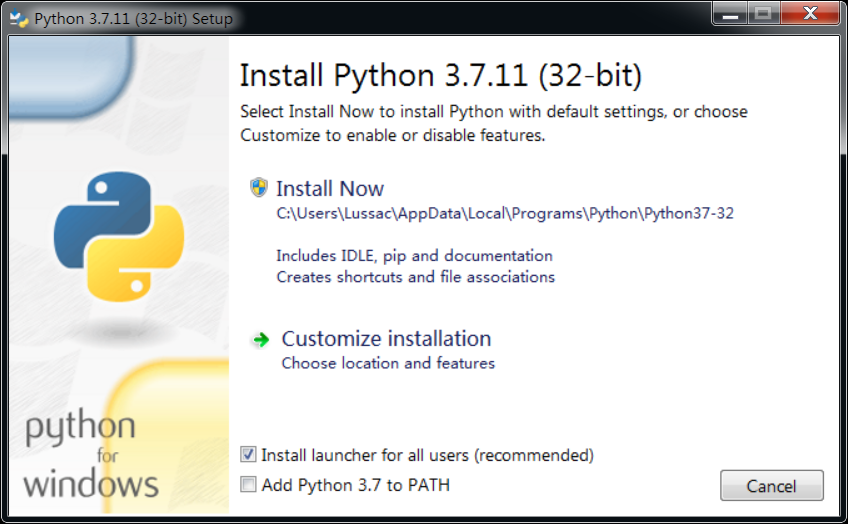
编译需要一段时间,若能正常编译,则完成后的输出位于 PCbuild/{win32|amd64}/en-us 和 由 -o 参数指定的目录下。其中包含 python-3.7.11.exe , python-3.7.11-embed-win32.zip , python-3.7.11-webinstall.exe 等。双击打开 python-3.7.11.exe 即可正常执行 Python 3.7.11 的安装流程。
若想使自己编译的
python-3.x.x-webinstall.exe能够正常使用,则需要指定--download参数并自行使用服务器提供其他.msi文件下载。总之不建议使用。
启用 PGO 优化
简洁起见,下文将刻意省略
-o参数,记得自行指定。
构建 64 位 Python 安装包 所使用的命令为:
buildrelease.bat -x64 --skip-pgo --skip-nuget 其中 --skip-pgo 参数为 "构建 64 位安装包时不使用 PGO" 。
若需启用 PGO 优化,经过测试,须先将 pgort140.dll 复制到 C:\Windows\System32 目录下。
pgort140.dll可以在 VS2017 的安装目录下找到。以本文采用的默认安装路径为例,其位于
C:\Program Files (x86)\Microsoft Visual Studio\2017\Community\VC\Tools\MSVC\14.16.27023\bin\Hostx64\x64\pgort140.dll,其中Community,14.16.27023,Hostx64等取决于你所安装的 Visual Studio 版本。其大小约为 55 KB 。
对应的命令为:
buildrelease.bat -x64 --pgo -V --skip-nuget 注意上述命令中的 -V 不是传递给 buildrelease.bat 的参数,而是为 --pgo 参数设置的值,可以看作 --pgo="-V" 。
其中 --pgo 参数为 "The job to use for PGO training" ,其值将传递给 PCbuild/build.bat 的 --pgo-job 参数 [11] [12] 。其默认值为 -m test --pgo ,相当于 CPython-x64 编译完成后执行 python -m test --pgo 的测试任务。
这会导致构建时间极大地延长,或卡在某一 test 阶段。因此不妨将其值设置为 -V,即简单地打印版本号信息 ( python -V ) 后即可继续编译 msi 文件。
若你不想跳过上述的测试阶段,则可以不使用 --pgo 参数以保持默认值:
buildrelease.bat -x64 --skip-nuget至此,编译完成。
其他
无法打开输入文件 "libffi-7.lib"
cpython-bin-deps 于 2021-08-27 发布了 libffi-3.4.2 ,其中 libffi-X.dll 的文件名由 libffi-7.lib 改为了 libffi-8.lib 。而 PCbuild/get_external.bat 中的 libffi 并未指定版本号 ,即始终下载最新版。于是自 2021-08-27 开始,编译 Cpython 3.7.12 / 3.8.12 等版本时将出现以下错误:
  winsound.vcxproj -> C:\Users\Lussac\Desktop\Python-3.8.12\Tools\msi\..\..\PCbuild\\win32\winsound.pyd
  _ctypes.c
  callbacks.c
  callproc.c
  cfield.c
  malloc_closure.c
  stgdict.c
LINK : fatal error LNK1181: 无法打开输入文件“libffi-7.lib” [C:\Users\Lussac\Desktop\Python-3.8.12\PCbuild\_ctypes.vcxproj]

生成失败。
解决方法:
:: 修改 `PCbuild\get_external.bat` ,为 libffi 指定版本号
if NOT "%IncludeLibffi%"=="false"  set binaries=%binaries% libffi-3.3.0

:: 删除 `externals\libffi\` 文件夹并重新下载
$ PCbuild\get_externals.bat

:: 还原 `PCbuild\get_external.bat` ,或丢弃所有修改
$ git checkout .

:: 重命名 `externals\libffi-3.3.0\` 文件夹为 `externals\libffi\`
$ ren externals\libffi-3.3.0 libffi

:: 尝试重新编译 Cpython
$ PCbuild\build.bat
或者你可以选择更新 VS 项目的构建配置文件,以指定 libffi 版本为 8 。但我暂未尝试,如果你感兴趣,可以参照以下提交来修改:
- Update libffi dll name to libffi-8 · PR#28203 · python/cpython
- bpo-45022: Update libffi to 3.4.2 in Windows build · PR#28146 · python/cpython
- issue 45022: Update libffi to 3.4.2 - Python tracker
在 Windows 10 上编译
在 Windows 10 上可以正常地编译 CPython 。但在编译 MSI 安装包前,需要通过 "控制面板 -> 程序 -> 启用或关闭 Windows 功能" 来启用 .NET Framework 3.5 ,以使 Wix 能正常运行 [13] 。
基于相同原因,你可以在 Windows 10 Sandbox 中编译 CPython ,但无法编译 MSI 安装包。因为你无法在 Windows Sandbox 中通过控制面板来启用 .NET Framework 3.5 。(至少我暂未找到方法) [14]
通过 Build Tools for Visual Studio 编译
你甚至可以抛弃 Visual Studio IDE ,使用 Build Tools for Visual Studio 2017 进行编译。
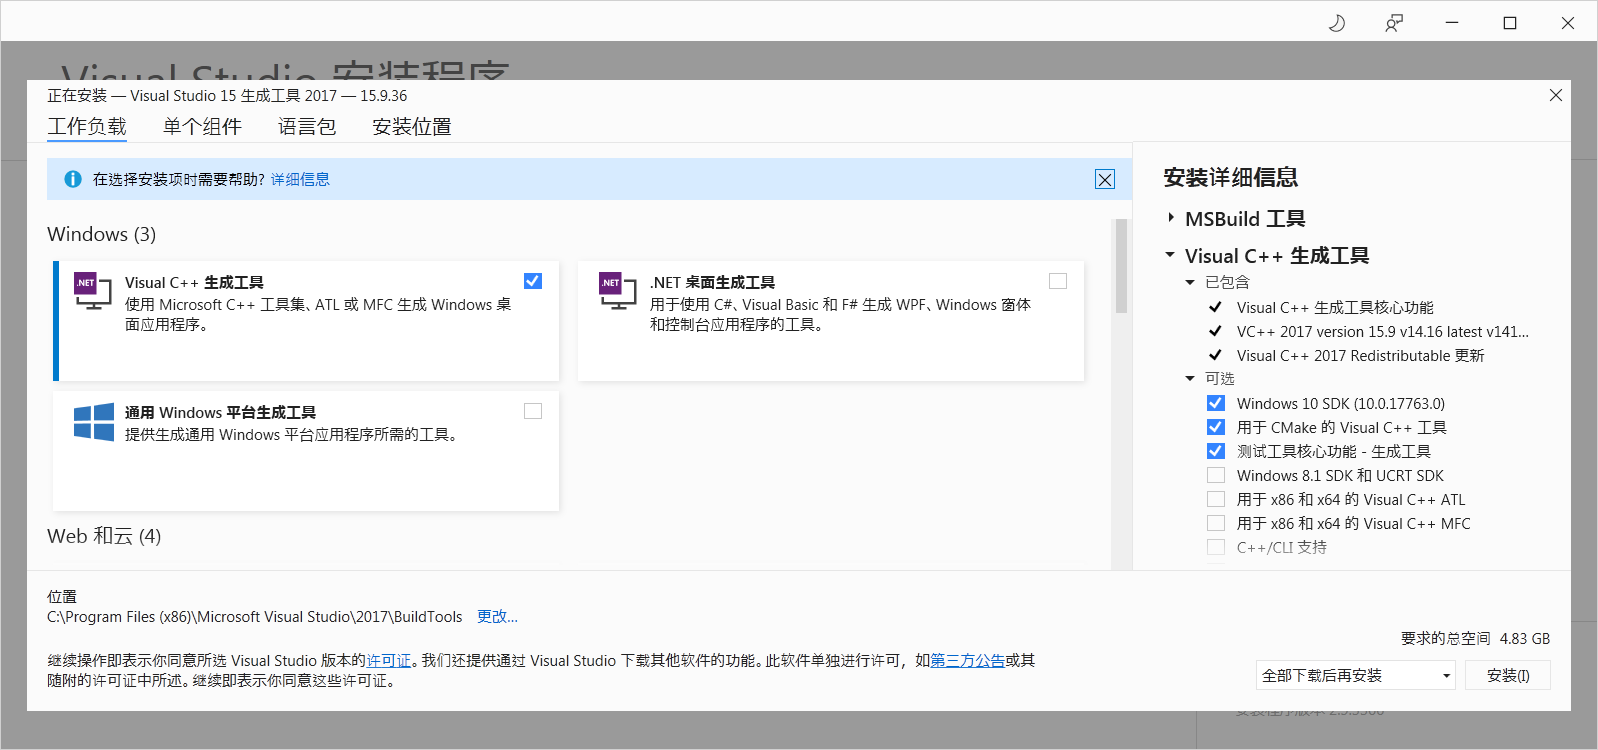
下载 vs_BuildTools.exe 并运行。选择 工作负载 中的 "Visual C++ 生成工具 " ,并保持其默认的三个可选子项。安装后即可正常地编译 CPython 。
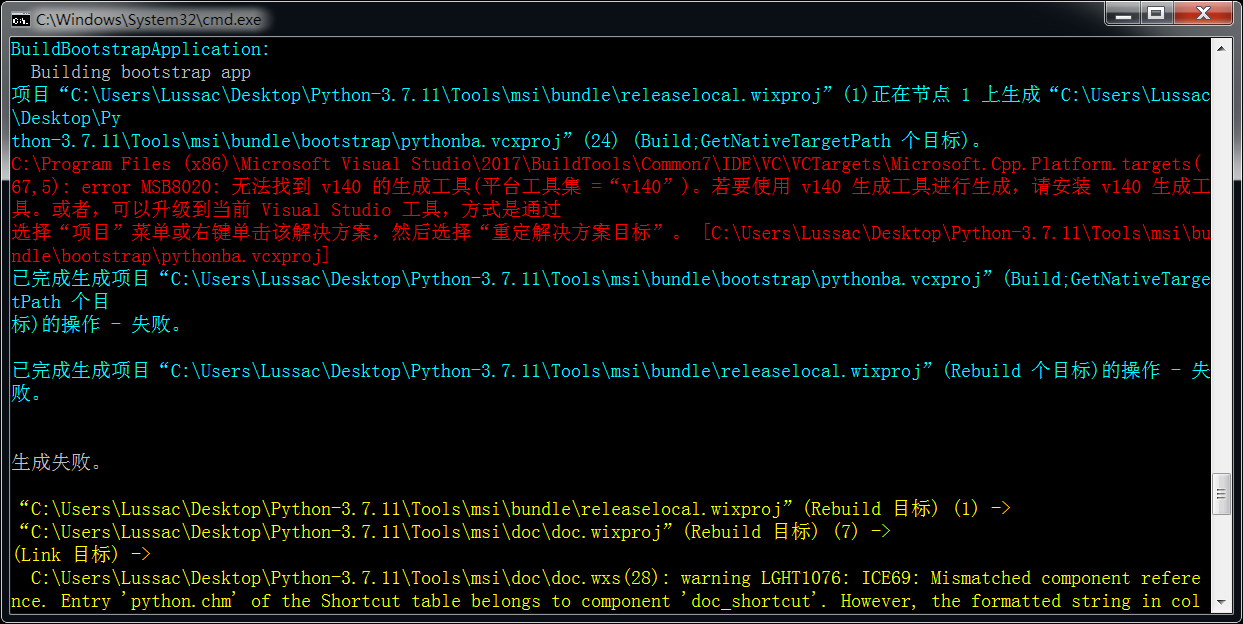
若需编译 MSI 安装包,则还须额外勾选子项 "适用于桌面的 VC++ 2015.3 v14.00 (v140) 工具集 "。
否则你将遇到错误:error MSB8020: 无法找到 v140 的生成工具(平台工具集 =“v140”)
下载
这里提供按以上方法自行编译的 Python 安装包的 下载 (访问密码为 lussac ) 。请勿在生产环境中使用。
- 编译环境:
- Visual Studio Professional 2017 (version 15.9.36) (MSVC 14.16)
- Windows 7, Service Pack 1, 7601, 64-bit (虚拟机)
编译时 实际使用的命令 为:
# 使用 git 获取源码(以在 Python REPL 中正确地显示 tag 和 commit-hash)
$ git clone -b v3.7.11 --depth 1 https://github.com/python/cpython.git Python-3.7.11

# 编译时跳过 PGO 测试和 Nuget 包的构建。
$ Tools\msi\buildrelease.bat --pgo -V --skip-nuget -o C:\Users\Lussac\Desktop\outputs > C:\Users\Lussac\Desktop\build.log 2>&1
在宿主机的 Windows 沙盒中重新安装 python-3.7.11-amd64.exe 并执行测试:
$ python -m test
...
== Tests result: FAILURE ==

367 tests OK.

6 tests failed:
    test__locale test_distutils test_locale test_os test_webbrowser
    test_winconsoleio

43 tests skipped:
    test_asdl_parser test_clinic test_crypt test_curses test_dbm_gnu
    test_dbm_ndbm test_devpoll test_epoll test_fcntl test_fork1
    test_gdb test_grp test_ioctl test_kqueue test_multiprocessing_fork
    test_multiprocessing_forkserver test_nis test_openpty
    test_ossaudiodev test_pipes test_poll test_posix test_pty test_pwd
    test_readline test_resource test_smtpnet test_socketserver
    test_spwd test_syslog test_threadsignals test_timeout test_tix
    test_tk test_ttk_guionly test_urllib2net test_urllibnet test_wait3
    test_wait4 test_winsound test_xmlrpc_net test_xxtestfuzz
    test_zipfile64

Total duration: 25 min 28 sec
Tests result: FAILURE
再对比沙盒中 自编译版 Python 3.7.11 和宿主机中 官方版 Python 3.7.9 的测试结果:
python -m test --pgo -q >log.txt 2>&1- 两者都未通过的:
- test_locale
- test_ssl
- test_winconsoleio
- 自编译版通过而官方版未通过的;
- test_strptime
- test_time
- test_uuid
- 官方版通过而自编译版未通过的:
- test_distutils [15]
参考资料
- Python 3.7.11 documentation
- Compile CPython on Windows — Python Development 1.0 documentation
- Build CPython on Windows — Tutorial to contribute to the CPython project
- Getting Started - Python Developer's Guide
- GitHub - python/cpython
- Python3.7 源码在 windows(VS2015)下的编译和安装 - CSDN
- What does
--enable-optimizationsdo while compiling python? - Stack Overflow - Visual Studio 的离线安装 :
pgort140.dllnot found - Visual Studio Feedback- cannot open file 'python37.lib' :
- 彻底解决 error: Unable to find vcvarsall.bat - CSDN
- How to build embeddable Python - Stack Overflow
能帮助编译在windows7上运行的python 3.9 二进制文件?
Python 3.9.0 及以上的版本不再支持 Windows 7,对官方放弃支持的 Windows 7 自行重新提供技术支持似乎并不是一件易事,至少需要修改源代码和维护缺失的API。
如果确实需要在 Windows 7 上安装运行 Python 3.9,你可以从 NulAsh/cpython 下载其他第三方编译的安装包,当然安全性与稳定性问题需自行承担。
参考资料: (1), (2), (3)
感谢,内容很详细
感谢支持!
3.7.13 会更新吗?感谢。
我明天编译一下吧已经编译好并且上传了大佬 .14 还接着更新吗?
下周五之前编译一下吧已经编译好并且上传了